
You build a mosaic from three things: material, tools and the rules of laying. Courses and books will help with the rules, and a shop with the first two. We are the ArtWorker mosaic school in Moscow. Every week we hear the same questions from beginners: which smalti to take, whether one pack is enough, which tiles are frost-proof, what to cut with and what to glue on. This guide answers them in order. Every illustration in the article is a mosaic made from real colours that are in stock right now. Under each one you will see what to buy, and how much, to repeat the work.

In short
- Material: for a first project, use smalti cut to module (MELTI, ArtWorker V3.2) or Flory glass tiles. You hardly need to cut them yourself.
- Tile size depends on the distance to the viewer: 10 mm for work seen up close, 20–24 mm for a wall or façade.
- Order of laying is always the same: frame → figure outline → figure → outline row → background.
- How much to buy: hand-cut smalti covers about 1 dm² per 150 g; add 10–15 % to your estimate for breakage.
- Minimum tools: wheeled nippers, tweezers, palette knife, adhesive and a backing board.
In this article: materials · tile size · background layouts · order of work · colour and grout · tools · how much to buy · three projects · kits · questions
What to make a DIY mosaic from: smalti, glass, stone
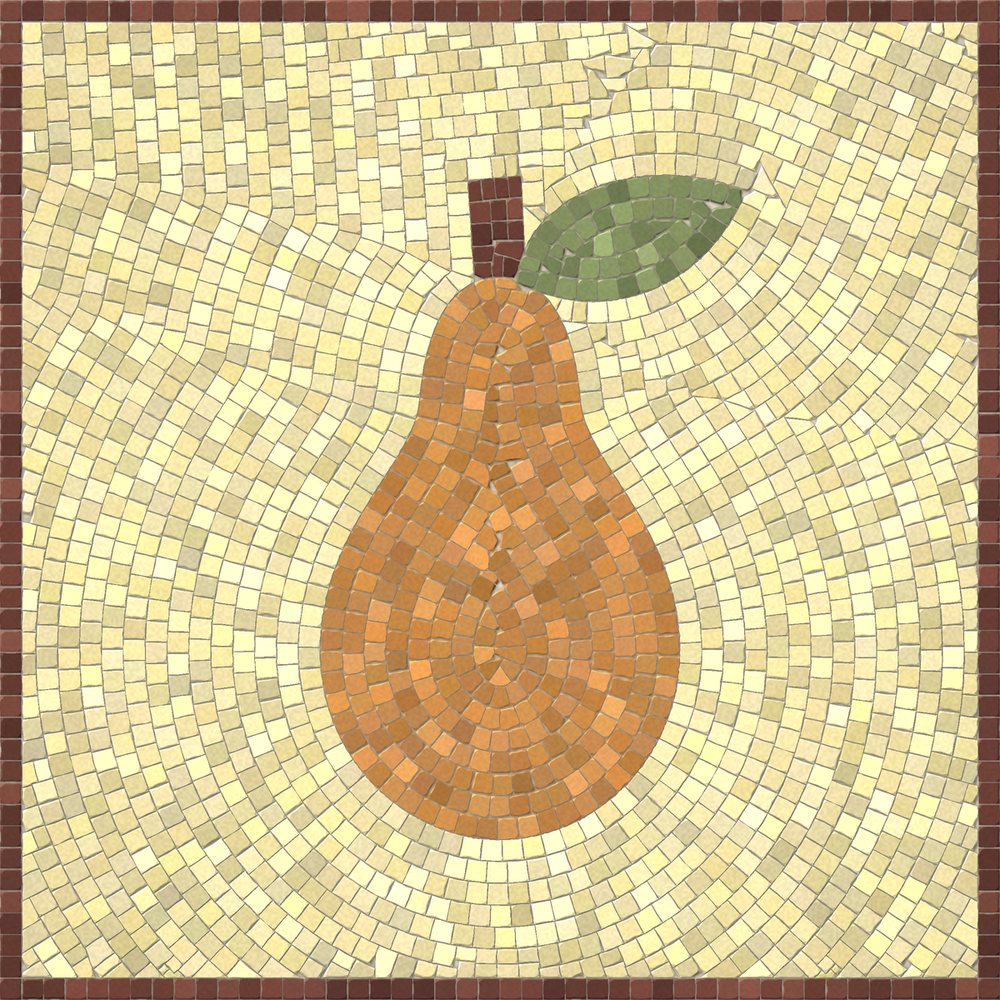
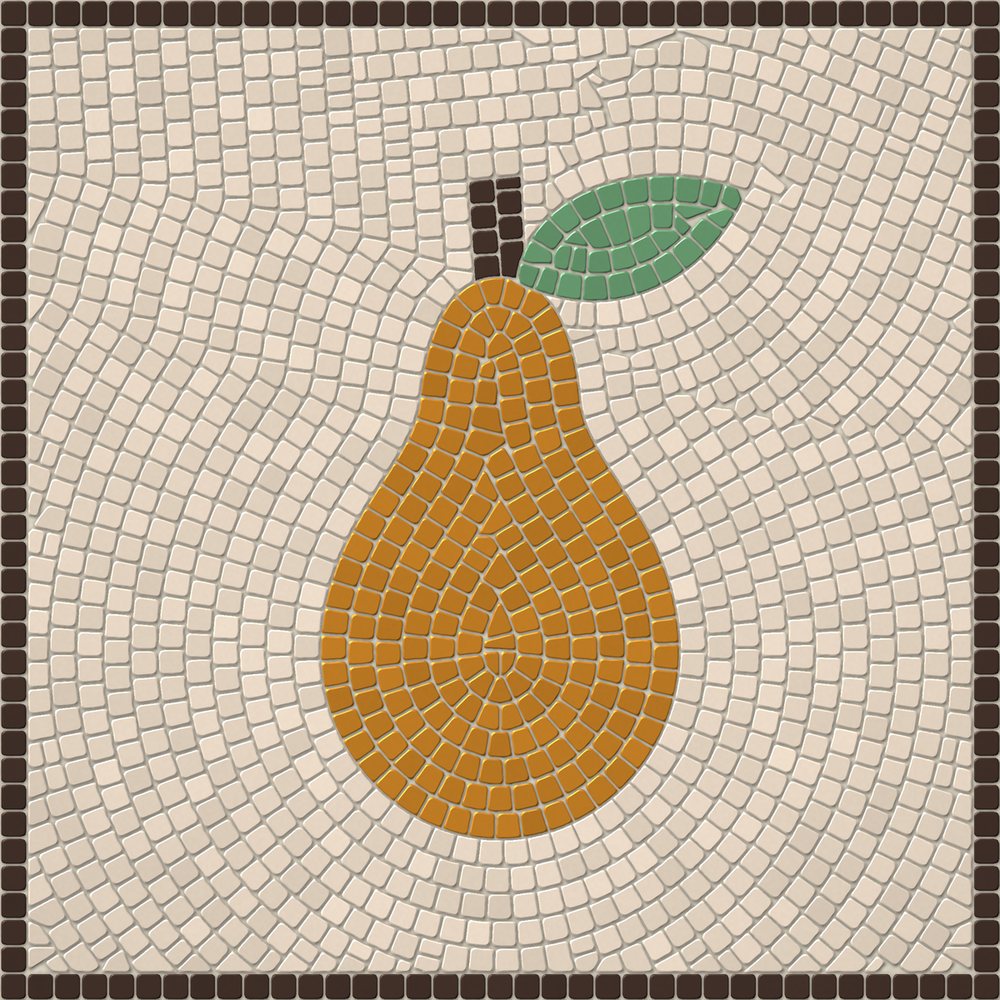
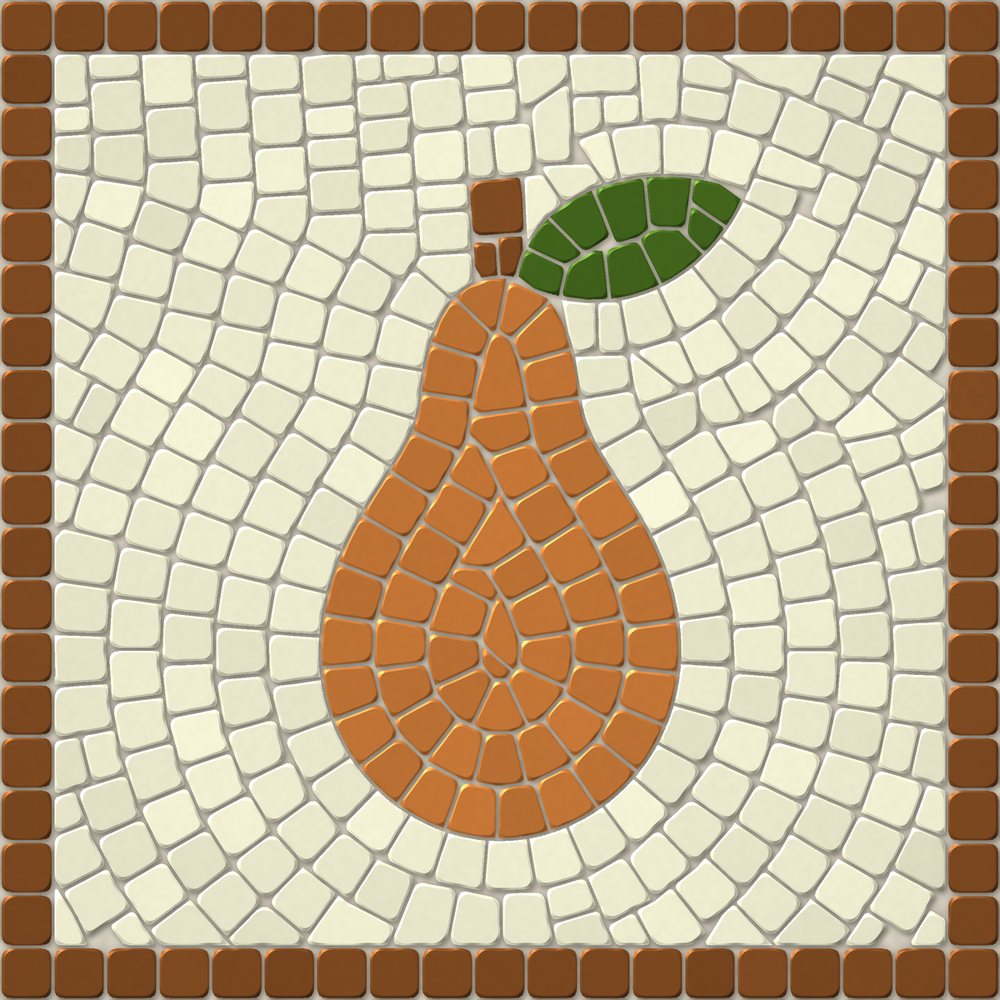
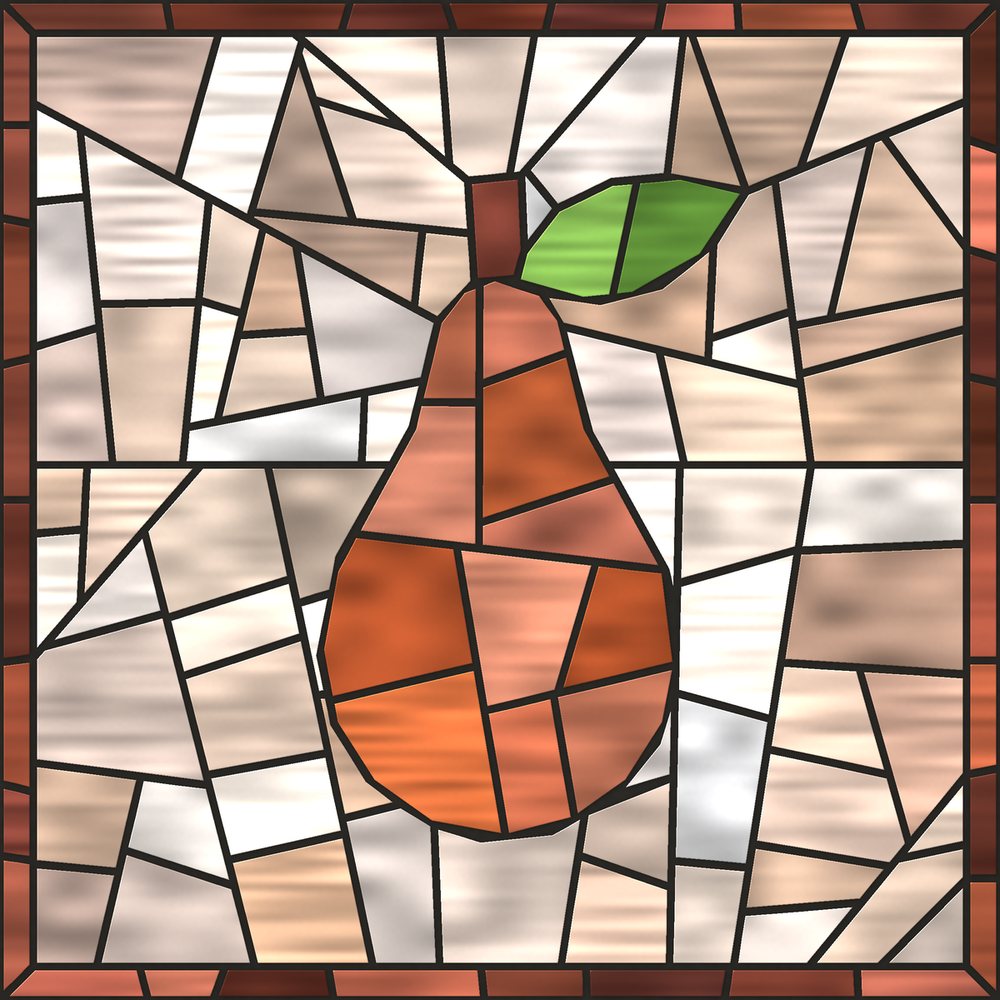
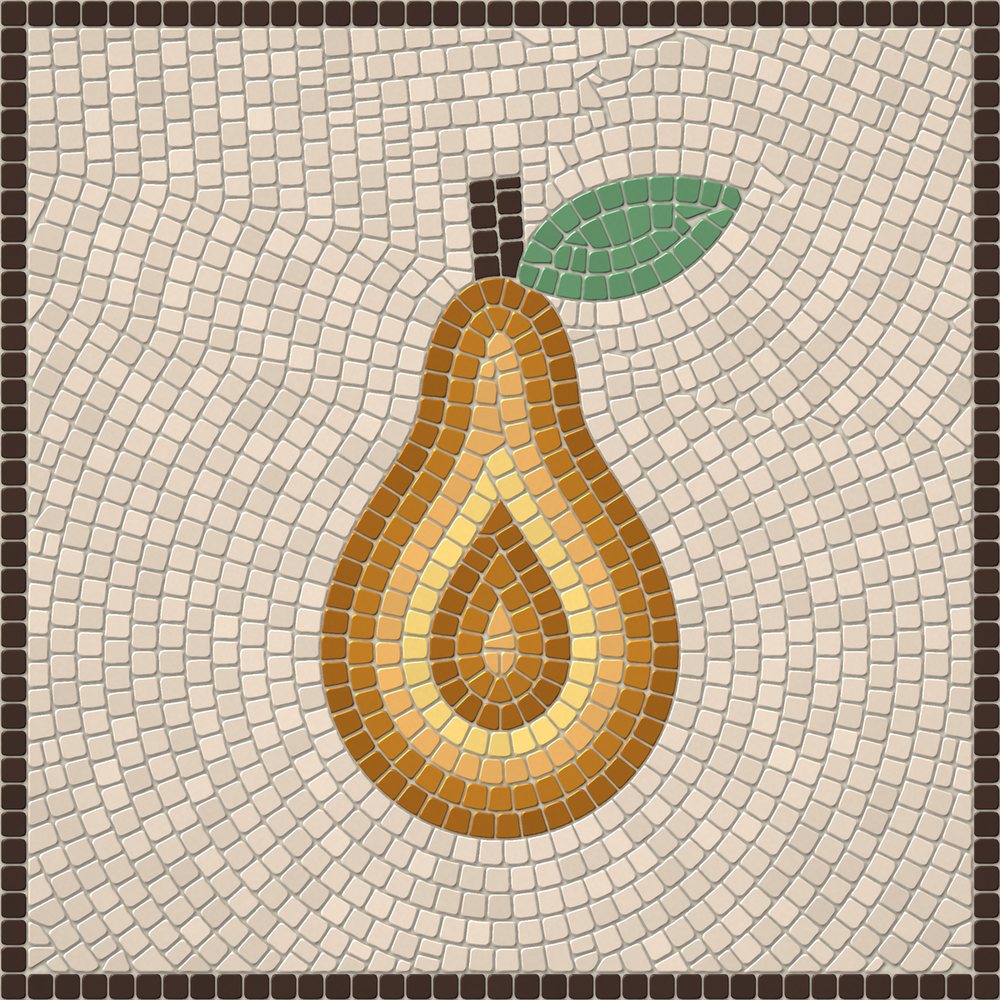
The material matters more than it seems. It determines the colour, the shine, the size of the piece, the tool you need, and even where the work can live: in a room, in a bathroom or outdoors. To make the difference obvious, we made the same 48×48 cm pear from six materials from our shop. The drawing, the frame and the “following the figure” background are identical in every one; only the material changes.


| Material | Piece | Pack | Best for | Cut with |
|---|---|---|---|---|
| MELTI smalti | 10×10 mm, hand-cut | 150 g ≈ 1 dm² | first project, small details, portraits | wheeled nippers |
| ArtWorker V3.2 smalti | 10×17 mm, hand-cut | 200 g ≈ 1.3 dm² | panels, icons, “museum-style” work | wheeled nippers |
| Smalti plates | 91×91 or 190×190 mm | 200–500 g | cut it yourself to module or into shards | hammer and hardie, glass cutter |
| Flory12 | 12×12 mm | 0.5 kg ≈ 19×19 cm | kitchen, bathroom, outdoors, children's projects | wheeled nippers |
| Flory24 | 24×24×5 mm | 0.5 kg ≈ 19×19 cm | large panels, signs, façades | wheeled nippers |
| Stained glass | sheet 26×30 cm | sheet | Tiffany, fusing, inserts in a mosaic | glass cutter, breaking pliers |
For more on the materials themselves, see the articles “What is smalti”, “Smalti bricks or hand-cut” and “A guide to glass mosaic tiles”. For trencadís and breakage, see the article “Trencadís: Gaudí-style mosaic”.
School tip
If the work will be outdoors, on a floor or in a shower, choose Flory glass tiles or stone: they are frost-resistant and not afraid of water. Smalti also lasts for centuries, but it is too slippery for a floor and too sharp at the edge.
Which tile size to choose
Compare the first and fourth pears above. With 10 mm tiles the leaf and stalk came out thin and the rows flowing. With 24 mm tiles the same pear became graphic, almost poster-like, and the stalk is at its limit: it is one tile wide. In a mosaic, only what is larger than a few tiles reads clearly. A figure needs to be 12–15 tiles tall, and the smallest detail, such as an eye, a petal or a stalk, no less than 2–3 tiles.
| Where the work will be | Distance to the viewer | Tile | What to buy |
|---|---|---|---|
| Tabletop, jewellery box, stand | up to 40 cm | 10 mm | MELTI 10×10, Flory12 |
| Wall panel in a room | 1–2 m | 10–15 mm | smalti 10×17, Flory12 |
| Hallway wall, kitchen backsplash | 2–3 m | 15–24 mm | Flory24, smalti plates |
| Façade, fence, flower bed | more than 3 m | 24 mm and larger | Flory24, 190×190 plates to break into shards |
Smaller tiles give more detail, but also more work and more material. A 48×48 cm pear in MELTI is about 2 250 pieces, and in Flory24 about 410.
Background layouts: how to lay the mosaic around the drawing
The background is 60–75 % of the area of a work. It takes the most material, and it sets the character of the mosaic. Below is the same Flory12 glass tile pear on six backgrounds. The tiles and colours are the same; only the direction of the rows changes. This is especially clear with glass tiles: 12×12 mm squares show each layout well.

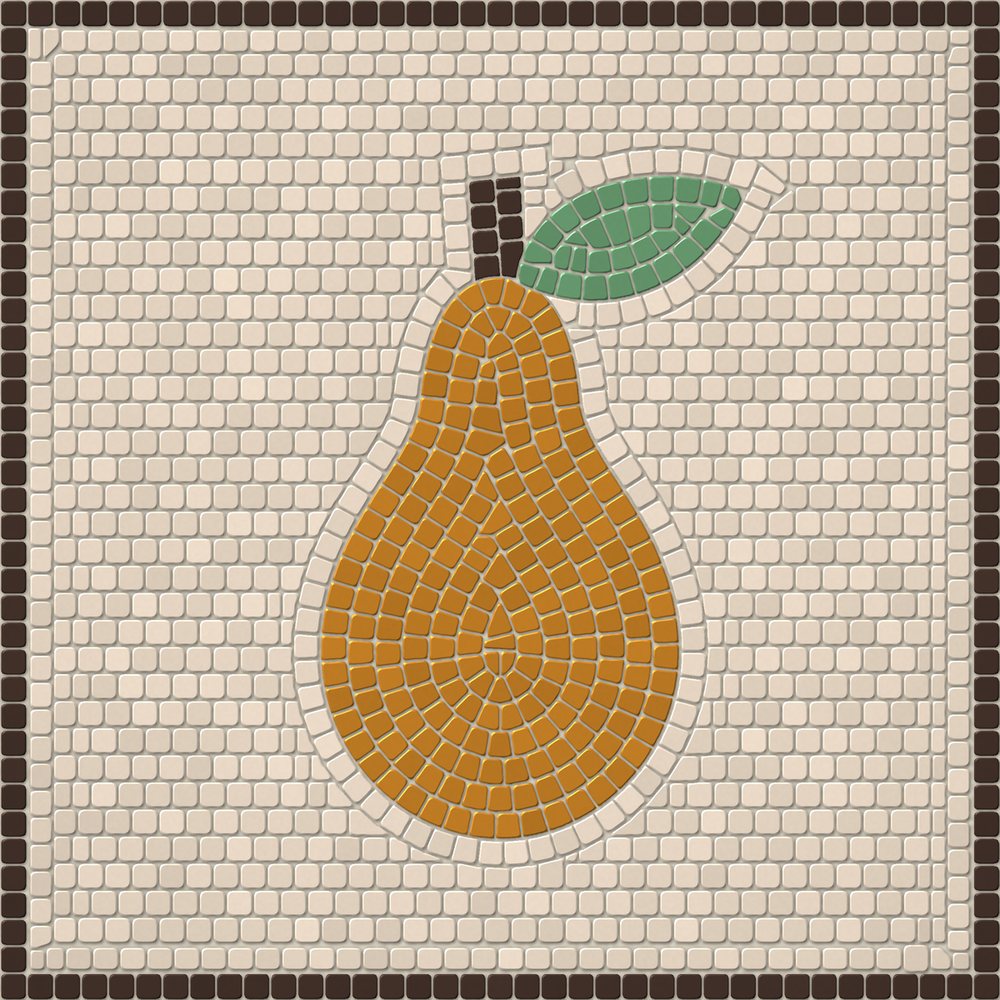
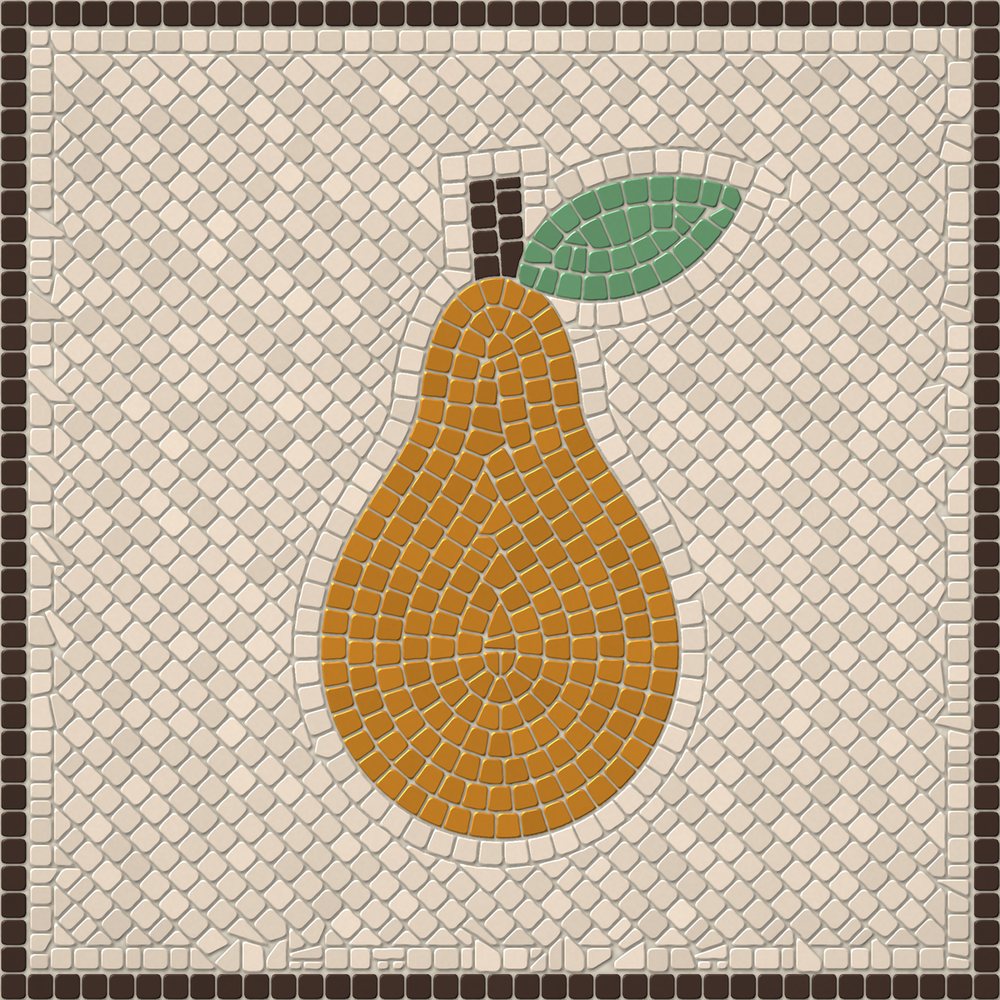


What to buy for a Flory12 pear with a circle background · 48×48 cm panel
The material for this work comes to about 5 800 ₽ (prices as of 22 November; packs include an allowance for breakage).
For your first project, choose rows or a background following the figure: you hardly need to cut the tiles, and a mistake does not catch the eye. Leave circles and the fan for your second or third project, when you can confidently cut trapezoids with nippers. One layout, one rhythm: a fan behind complex lettering fights with the letters, while circles around a simple figure set it off. More techniques are in the article “Tricks for laying mosaic”.
How to lay a mosaic properly: the order of work
The direction of the rows in a mosaic is called andamento. The rows behave like brushstrokes: they follow the shape and give it volume. For the rows to lie well, makers always lay a work in the same order, from what sets the boundaries to what fills them. Here is our MELTI pear step by step. The faded areas show what has not been laid yet.

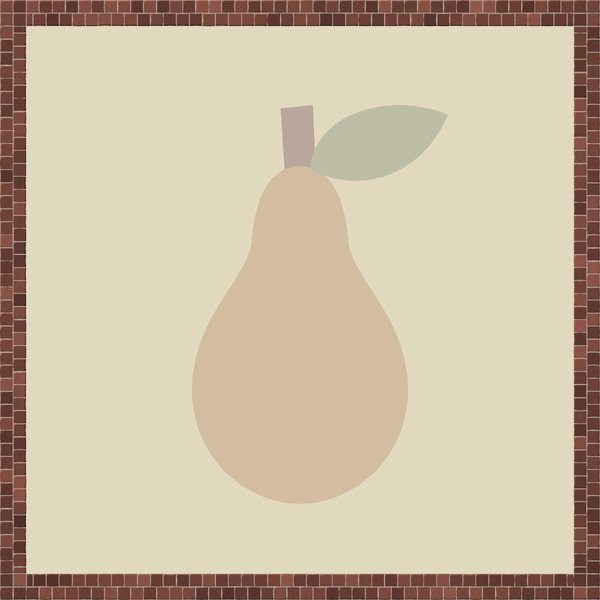
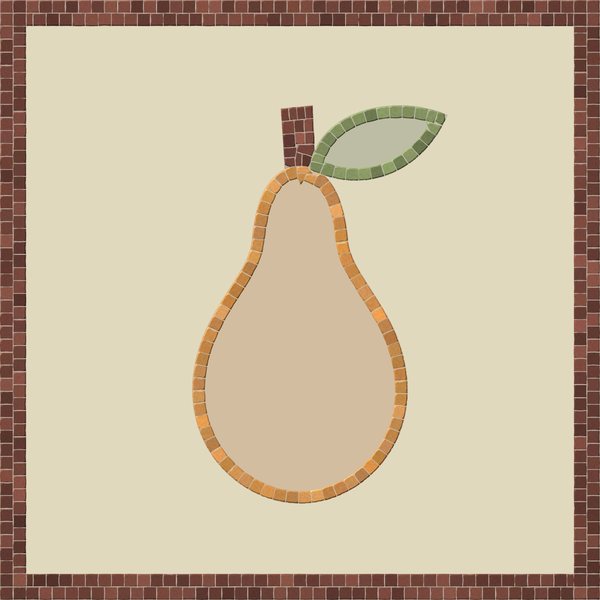
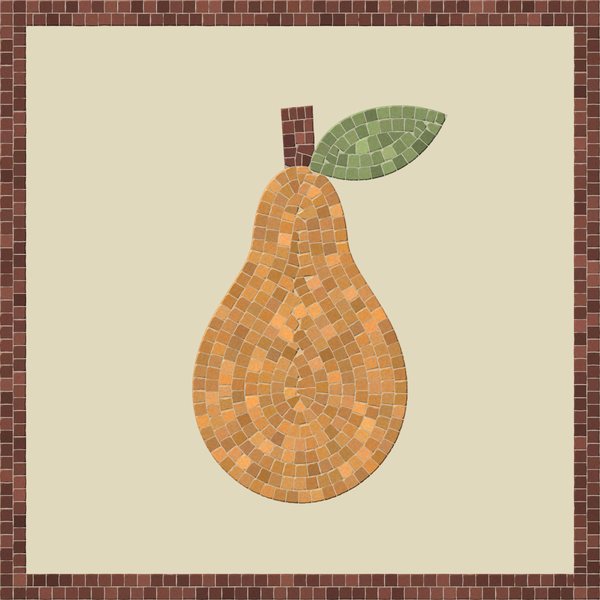
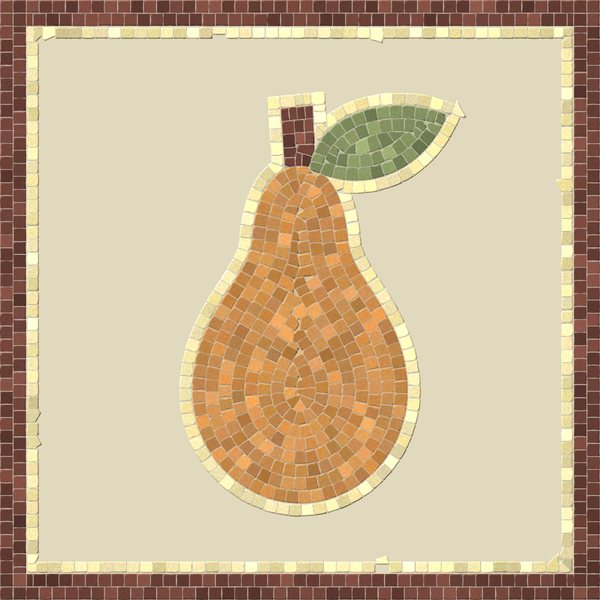
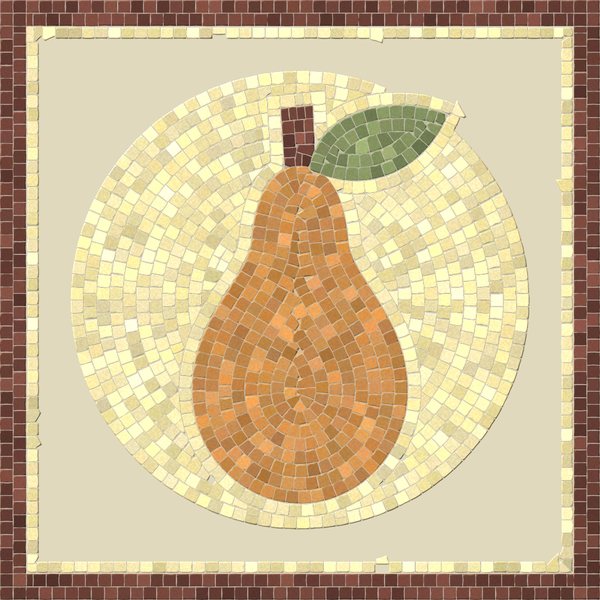
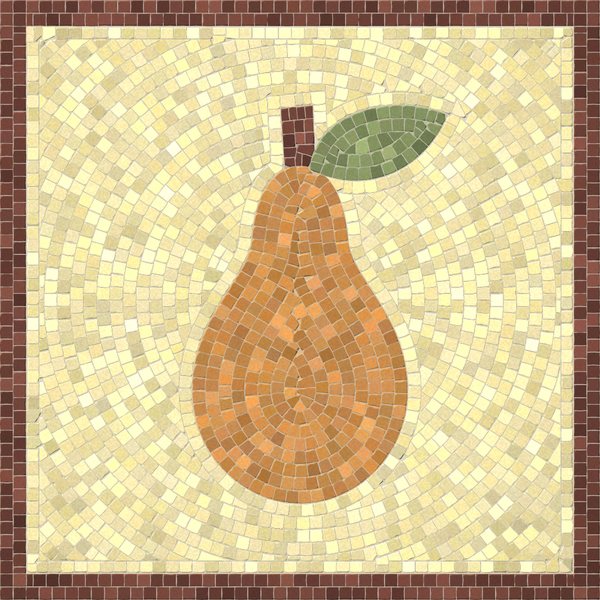
What you need at each step:
- Template — paper, a marker and an MDF backing board of the right size. You can make the sketch in the andamento.appapp: it turns a photo or an idea into a mosaic sketch and calculates the material by colour.
- Frame and outline — Kerabond T adhesive (white for glass and light smalti), a palette knifefor picking up adhesive, and tweezers.
- Figure — wheeled nippers: you use them to trim pieces into trapezoids at the outline and in the middle.
- Background and grout — grout and a sponge. For how to grout, see the article “How to grout a mosaic”.
What to buy for a MELTI pear · 48×48 cm panel
| Material | Packs | Total |
|---|---|---|
| Note Y17 hand-cut smalti 10×10 mm, 150 g | 20 | 6 600 ₽ |
| Note T45 hand-cut smalti 10×10 mm, 150 g | 4 | 1 320 ₽ |
| Note R80 hand-cut smalti 10×10 mm, 150 g | 3 | 990 ₽ |
| Note G54 hand-cut smalti 10×10 mm, 150 g | 1 | 330 ₽ |
The material for this work comes to about 9 240 ₽ (prices as of 22 November; packs include an allowance for breakage).
Check before you buy
Want to try first how the rows lie and which grout colour looks best? Build a mosaic on screen in the free simulator ANDAMENTO Play: it has smalti, stone and glass at full size, plus nippers, adhesive and grout. Then order the same material from us.
Colour and grout: making the mosaic read clearly
Three colour rules that save money: fewer spare packs and less redoing.
- The figure is clearly lighter or darker than the background, not just a different colour. Red on green of the same brightness will blend together from two metres away. A simple check: photograph your sketch and convert it to black and white.
- The 60–30–10 proportion. The background is about 60 % of the area, in a calm colour. The figure is about 30 %. The accent is about 10 %: the frame, a leaf, one detail. So the background needs the most packs: in the MELTI pear above, the background is 20 packs out of 28.
- Close shades for a lively background. A pattern in 3–4 neighbouring shades of one colour looks richer than one shade. Four distant colours look choppy.


Glass tiles, floor mosaics and bathroom mosaics are always grouted. A smalti panel for a room is often left ungrouted: open joints emphasise the texture of the cut edge. Wet areas and outdoor work need epoxy grout or cement grout with Isolastic latex additive — the same additive also makes the adhesive moisture-resistant.
Mosaic tools: what you need to start
| What | Why | Example in our shop |
|---|---|---|
| Wheeled nippers | to trim smalti and glass into trapezoids | RedCut 81 — 1 690 ₽; professional Montolit 55W2 |
| Stone nippers | stone and thick tiles | RedCut 83 — 1 190 ₽ |
| Tweezers | to set small pieces in adhesive | RedCut tweezers set — 850 ₽ |
| Palette knife | to pick up and spread adhesive | palette knife 165 mm — 190 ₽ |
| Adhesive | cement-based, white for glass and light smalti | Kerabond T white, 1 kg — 330 ₽ |
| Backing board | MDF for work indoors | MDF 50×50 cm — 440 ₽, all sizes |
| Goggles | splinters fly in all directions when you cut | safety goggles — 290 ₽ |
| Hammer and hardie | to cut smalti from plates and bricks | ArtWorker hammer 0.4 kg, hardie — once you have mastered the nippers |
Don't want to collect them one by one? Get the mosaic tool kit (3 690 ₽, 9 items in a case). For a full rundown, see the articles “Mosaic tools”, “Mosaic nippers” and “How to cut smalti”. For help choosing adhesive and a backing board, see “Which adhesive to choose” and “Backing boards for mosaic”.
How much smalti and tile to buy for a mosaic
Smalti and tiles are sold by weight, but what you lay is an area. Here is how to convert:
- Hand-cut smalti — about 1.5 g per square centimetre of finished mosaic, including the joint. A 150 g MELTI pack covers about 1 dm² (10×10 cm), and a 200 g V3.2 smalti pack about 1.3 dm².
- Flory12 and Flory24 glass tiles — a 0.5 kg pack covers about 19×19 cm.
- Allowance — 10–15 % for breakage, trimming and matching shades on the spot. The background, which covers the most area, needs the allowance first.
Example: a 48×48 cm MELTI pear is 0.23 m². The background takes 75 % of the area and uses 20 packs. The figure takes 4 packs, the frame with the stalk 3, and the leaf 1. In total that is 28 packs, about 9 200 ₽. The same drawing in Flory12 costs about 5 200 ₽: glass tiles are cheaper per unit of area, but they also look different.
The selector takes the colours of your sketch only from what is in stock, and adds adhesive, mesh, backing board and tools by itself. For how it calculates, see the article “How much material a mosaic needs”.
Three weekend projects: what to buy and what it costs
Below are three works of different character. All are made from colours in stock, and under each one is a full material list with links. Add the adhesive, backing board and tools from the section above.
House number in Flory24 glass tiles

House number: Flory24 · 60×42 cm panel
| Material | Packs | Total |
|---|---|---|
| FLORY24 D01 white glass tiles 24×24×5 mm, 0.5 kg | 4 | 1 720 ₽ |
| FLORY24 D19 brown glass tiles 24×24×5 mm, 0.5 kg | 3 | 1 290 ₽ |
| FLORY24 D02 beige glass tiles 24×24×5 mm, 0.5 kg | 2 | 860 ₽ |
The material for this work comes to about 3 870 ₽ (prices as of 22 November; packs include an allowance for breakage).
For outdoors, use cement adhesive with a latex additive, a cement board as the backing, and epoxy grout or cement grout with Isolastic.
“Lemons” kitchen panel in V3.2 smalti
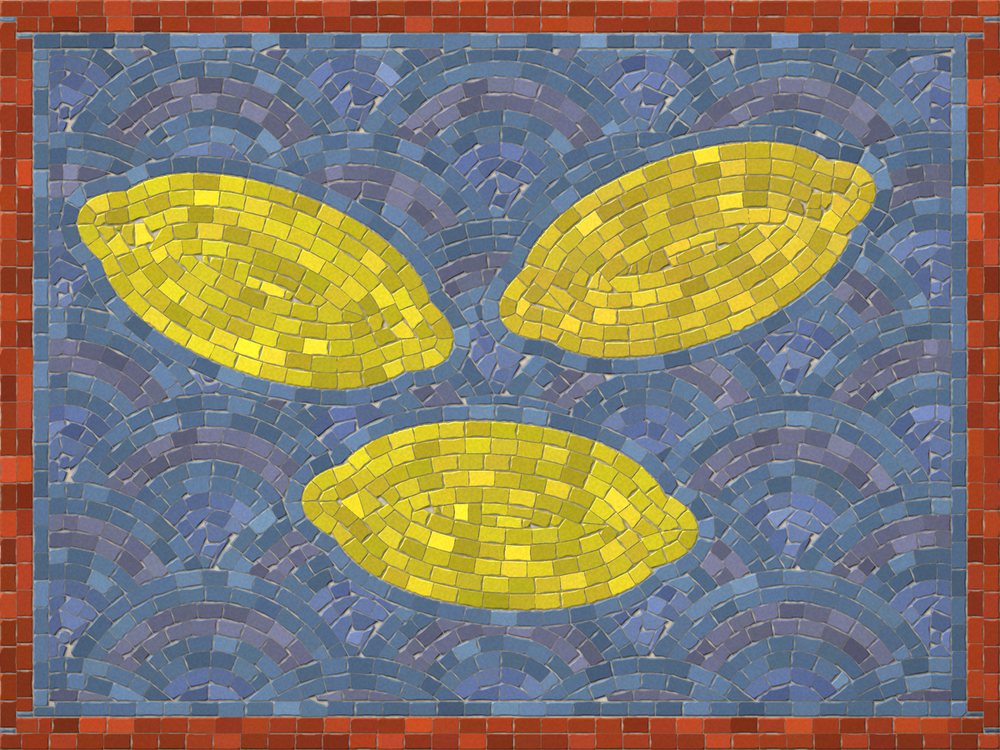
“Lemons” panel: ArtWorker V3.2 smalti 10×17 · 64×48 cm panel
| Material | Packs | Total |
|---|---|---|
| Smalti FQ05 hand-cut 10×17 mm, 200 g | 11 | 4 730 ₽ |
| Smalti TC15 hand-cut 10×17 mm, 200 g | 4 | 1 720 ₽ |
| Smalti FO20 hand-cut 10×17 mm, 200 g | 4 | 1 720 ₽ |
| Smalti SA15 hand-cut 10×17 mm, 200 g | 4 | 1 720 ₽ |
| Smalti SO04 hand-cut 10×17 mm, 200 g | 3 | 1 290 ₽ |
| Smalti FC20 hand-cut 10×17 mm, 200 g | 2 | 860 ₽ |
The material for this work comes to about 12 040 ₽ (prices as of 22 November; packs include an allowance for breakage).
“Swallow” in MELTI smalti

Swallow: MELTI smalti 10×10 · 42×42 cm panel
| Material | Packs | Total |
|---|---|---|
| Note Y17 hand-cut smalti 10×10 mm, 150 g | 16 | 5 280 ₽ |
| Note B56 hand-cut smalti 10×10 mm, 150 g | 5 | 1 650 ₽ |
The material for this work comes to about 6 930 ₽ (prices as of 22 November; packs include an allowance for breakage).
Mosaic kits: if you want everything at once
- MOSAICBOX — a ready-made kit with a sketch, material and backing board, for example “Bunny” for 1 990 ₽. Good as a gift and for a first project with a child.
- ArtWorker Mosaicbox DIY — a craft kit for 2 500 ₽.
- Mosaic tool kit — 3 690 ₽: nippers, a sponge, scrapers and more in a case.
We put together your own kit for a specific sketch with the material selector: upload a picture, tick the material, and everything goes into the basket with one button.
See the material in person in Moscow
The colour of smalti on a screen is always slightly different from what you see in your hands. In the showroom at 2 Dobrolyubova St., bldg 5, Moscow, you can hold the MELTI and ArtWorker V3.2 palettes, compare Flory glass tiles and stained glass, choose nippers that fit your hand, and pick up your order. To see what the showroom looks like, watch the video tour. Questions about materials: shop@artworker.pro, +7 (995) 780-09-90.
Frequently asked questions
What can you make a DIY mosaic from?
From hand-cut smalti, glass tiles, natural stone, stained glass and broken ceramic. For a first project the easiest options are smalti cut to module (MELTI, ArtWorker V3.2) or Flory glass tiles: the pieces are already the right size.
Which smalti should I buy for my first mosaic?
Smalti cut to module: MELTI 10×10 mm or ArtWorker V3.2 10×17 mm. You do not need to cut it with a hammer; wheeled nippers are enough for fitting. Smalti plates and bricks are for when you want to do the cutting yourself.
How much smalti do I need for 1 m² of mosaic?
About 15 kg of hand-cut smalti per square metre, that is, about 1.5 g per cm². That is 100 packs of MELTI at 150 g or 75 packs of V3.2 at 200 g. Add 10–15 % for breakage.
Which mosaic is suitable for outdoors and bathrooms?
Glazed, frost-resistant Flory12 and Flory24 glass tiles, and natural stone. For such work, mix the adhesive and grout with a latex additive, or use epoxy grout.
What tools does a beginner need for mosaic?
Wheeled nippers, tweezers, a palette knife, adhesive, a backing board and safety goggles. You will need a hammer and hardie later, for smalti plates and bricks.
How do I make a sketch for a mosaic?
Draw a silhouette and one background layout, check the contrast between figure and background in black and white, and add a frame. If you do not feel like drawing, the andamento.app app will build a sketch from a photo, and you can practise laying in the free ANDAMENTO Play simulator.
Read also: Mosaic for beginners: where to start · DIY glass mosaic · The reverse (indirect) mosaic method · Mosaic on mesh or on paper · A home mosaic workshop


